

Visual Narrative through composition plays a huge role in still image art such as painting, drawing and photography. It is also an important aspect in the moving image such as film and animation. But what about video games? How can we create a visual narrative through level design? And how can we create effective composition when the frame can essentially be moved anywhere and face anything? Follow along and learn how to create a beautiful engaging terrain using the Godot game engine.
What you will need
This tutorial will use a number of free assets obtained from OpenGameArt. Feel free to choose or create your own assets and ensure to credit the creators appropriately.
While this tutorial will be focused on the composition of level design, technical examples will be given using the Godot game engine. However, most of the tutorial could be easily replicated in another game engine such as Unreal4 or Unity.
Level design and the landscape in art and film
In a still image landscape such as a painting or photograph, techniques in composition can be used to draw the viewer's eye across the image to a point of interest. An example of this can be shown through the use of contrast, a lonely old tree standing in an otherwise empty field draws the eye in that direction. A large empty field with no point of interest is far less interesting and leaves the viewer not sure where to look. The same can happen in a poorly designed video game level, the player will become lost and not sure where to go.
The use of perspective lines is another technique which can be used to guide the viewer’s eye. A line of trees leading off into the distance to join with a mountain range or meandering stream is far more compelling to follow than a line of trees marching straight across the middle of the canvas.
Another common composition technique used in still imagery and fixed shot film angles is the rule of thirds, by dividing the shot into three horizontal segments and three vertical segments and aligning important objects characters along these lines we can create much more interesting and appealing shots. This too can help lead the eye, and it is worth considering when designing your Role Playing Game (RPG) environments.

The same techniques described above can be applied to film and the moving image. To highlight points of interest, perspective, horizon lines and contrast can prepare the audience for the next scene or shot. Film also has the added benefit of being able to pan or dolly the camera in order to create or enhance this effect of drawing the viewer in.
How composition is different/more challenging in games
While this is all very well and good, we are here to create video games, not film or fine art! While the above techniques can easily be integrated into your cut scenes or loading screens, once the player has entered the world they will often (depending on what type of game you are making) have complete control of the camera. This poses an additional challenge when creating a virtual world for use in your role-playing game.
In video games, effectively leading the player through the level becomes even more important. Many games have become overly reliant on immersion-breaking visual queues to tell the player where to go and what to do. Sparkly trails along the ground or massive way-point indicators floating in the sky are often used to lead a player to their next objective. This essentially removes the player from the beautiful environment you have created and forces them to focus on the marker and not the world they are playing in. Granted sometimes these visual queues are necessary but they should be used sparingly. If you have designed your level in a well thought out way they may not be necessary at all.

So how do we lead the player through the world? Firstly we must trust that the player is not going to point the camera straight at the ground or sky when entering the game. We can help them with this by limiting how far up and down the camera can be rotated.
We first need to encourage the player to face the camera in a certain direction, this can be achieved through using a contrasting element like our above example of a lonely tree in an open field. The player may now be inclined to point the camera in that direction. We can use this angle and position to begin work on our composition.
Before beginning to build the level come up with a story that will be told there. It can also be helpful to make some rough sketches and maps of your environment before beginning work in the game engine. In this tutorial we will create a scenario where an adventurer has entered a winding valley, here we want the hero to head towards an abandoned farm where he will find clues for the next part of his quest.
So let’s get started!
Creating a Godot project
If you do not already have Godot installed, head over to https://godotengine.org/download/ and follow the instructions to install the latest version for your system. I will be using the standard 64-bit version for Linux. Open Godot and create a new project by clicking the button on the right of the project manager window.
Basics of Zylians terrain tool
The Godot game engine does not come with a default terrain editor. However, luckily for us, there are many quality plugins developed by the Godot community. We will use the Godot Height Map Plugin by Zylann. To install the plugin go to this GitHub repo https://github.com/Zylann/godot_heightmap_plugin click the clone or download button and download the repository as a zip file.

Extract and open the zip file. Inside you will find an add-ons folder, copy this into your project directory. We now need to activate the plugin by going to project settings and selecting the plugins tab. In here you should see the Terrain plugin with a drop-down saying inactive. Change this to active.

The Hterrain node will now be available in the node selection tree. Create a new 3D scene and add the HTerrain node as a child. Clicking on the node will open up the terrain editor interface and inspector panel as shown below. In the inspector panel, click on the data directory button and specify a directory for storing your terrain data. Your editor window should now show a flat terrain.

Editing the Terrain
There are several brush types available for editing your terrain, they include a raise brush for creating hills, a lower brush for creating valleys, a smooth brush for smoothing out slopes, and the flatten brush. The flatten brush must be set with a default height and can be used to either delete hills or create plateaux. The opacity of each brush can be adjusted down or up to slow or speed up the rate that hills are created, you can also change the brush shape or select from a number of presets in order to make more knobbly or smooth terrain.
To start, place a camera where the player will enter and face it towards where your point of interest will be. With the root node selected click the plus in the top right of the screen editor and add a camera. Set your window up so you can have a camera view and an editing view by pressing CTRL+ALT+2. At the top right of the editor window, you will find a button to turn on distraction-free mode giving you more room to work.

I like to start with the flatten brush to block out the level, we can always smooth it later. Remember to keep the composition or your scene in mind as you work. Create a large expanse of flat ground for the valley floor and surround it by hills. The player will enter from an elevated position and look down over the valley towards a distant house. At this stage, use a simple cube mesh to represent the house.
Using the lower brush and raise brush, begin carving out the valley. Refer to your camera and try to make a nice composition with the hills. The hills should not make a straight line across the viewport, but create a sense of depth that leads the eye towards the focal point, our building.
Texturing the Terrain
At the time of writing, there are three different workflows for adding texture in Zylians terrain editor. These are the Classic 4 shader workflow, the Array shader workflow and the Low Poly workflow. While the newer Array shader workflow allows for many more textures, this tutorial will focus on the Classic 4 shader. This is for two reasons, we want to focus on the composition side of level development and not get bogged down in choosing textures, and secondly, by increasing our constraints we can help to develop our creativity. The Array shader is also at a developmental phase and could change in the future!
There are a number of places to obtain textures for your terrain both paid and free. And of course, the option to make your own also exists! I will use textures from https://cc0textures.com/ but also recommend looking at https://opengameart.org/.
Chose at least the following textures: grass, dirt or gravel, road or cobblestone, stone or cliff
Set up your textures with albedo and normal maps. Then start by blanketing the whole terrain in a single grass texture, use a combination of dirt and cobblestone texture to create a road. Think about how the line of this road will add to your composition, try to compliment the way that the hills lead the eye towards the house from the top corners of the viewport, by winding the road towards the house from a bottom right corner. Keeping the opposite corner empty of strong lines and shapes helps create contrast. The fourth slot in the classic 4 shader is primarily used for cliffs, you can use the dark lines of the cliffs to add more line and contrast to your composition.

Create some variants in your base texture with the colour brush or an alternative ground texture, you may want to use a different colour for your hills to differentiate them from the valley floor. I recommend using an odd-shaped brush such as the vegetation_1e for a more natural look.
Add some basic lighting with a directional light and enable shadows in the inspector. The directional light acts like a sun casting constant light in a defined direction. Play with the rotation of the light till you get an effect you are happy with. Our landscape is beginning to come to life!

At this stage, to ensure your composition works, place additional cameras along the path the player is likely to take. Add some additional mountains to the background of your terrain and add a skybox to your camera for that extra level of realism. The skybox settings can be found in the camera inspector tab.

Placing trees and other props
Our terrain is now looking quite nice although still rather sparse. It is time to add some props to our RPG world! For this tutorial, I will be using free assets from https://opengameart.org/. Using free assets like this is good for prototyping but beware that asset styles and colour palettes may not mix well, and you may need to edit or create your own assets in order to fit the art style of your RPG.
We will want a variety of trees and foliage rocks and other structures for our scene:
We will want a variety of trees and foliage rocks and other structures for our scene. The assets I will use are as follows:
Trees, rocks and shrubs.
https://opengameart.org/content/low-poly-trees-stumps-branches
This asset is was created by open game art user Lamoot under a CC by 3.0 license
https://opengameart.org/content/bushes
https://opengameart.org/content/freebies-mundo-commissions
https://opengameart.org/content/rocks-02
The above bushes and rocks large tree and vineyard are kindly provided under a CC0 1.0 Universal (CC0 1.0) Public Domain Dedication license.
Small medieval cottage:
https://opengameart.org/content/medieval-cottage
This asset was created by open game art user bobjh under a CC by 4.0 license
Other man-made structures:
https://opengameart.org/content/medieval-containers
https://opengameart.org/content/basic-wooden-fence
Kindly provided under a CC0 1.0 Universal (CC0 1.0) Public Domain Dedication license.
Please make sure to credit the creators of these assets and respect the licenses that these assets have been made available under.
You may need to pull these models into Blender to clean them up a little or save them to your desired format. I won’t go into details on the process for this tutorial. My preferred format for working in Godot is GLTF.
Begin by creating some groupings of objects. For example, using two types of tree model, make a small reusable composition. Start to place them around your terrain creating areas of contrast, remember to always lead the player towards points of interest. Do the same for other items such as shrubs, rocks, barrels and crates.

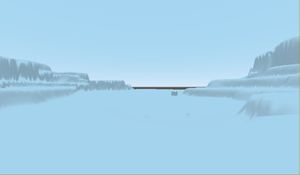
To create a distance effect to the mountains, we need to add some fog to our camera, set a bluish colour, and a distance that matches the mountain range. Remember the line of the mountain range should point towards your point of interest, the cottage.

Building a good terrain is no quick task and requires a lot of work, trial and error. However, by using some simple techniques of composition, we can speed up the process and create compelling terrain for our RPG worlds.

I hope you have found this tutorial useful :)
Happy developing!


