How to model a low poly stylised pine tree in Blender
Aug 4, 2020
More in this series
- An introduction to creating 3D stylised trees and forests in Blender
- How to model a low poly stylised pine tree in Blender
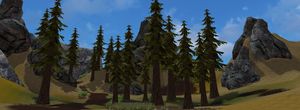
Pine trees are perhaps the most widely used tree in role-playing games, they are also one of the easiest tree shapes to model, particularly the Christmas tree-like pine commonly found in alpine scenes. So this is where we will begin.
Open Blender and select the default cube. We are going to model a very low poly version first, this allows us to form the basic shape of the tree before going back and adding detail. We can also use this low poly version later for one of our LOD levels. Press TAB to enter edit mode then select the bottom face and delete by pressing the X keyand selecting DELETE FACE.
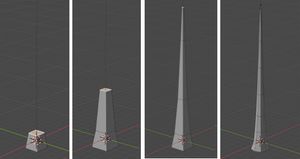
With ALT+Z you can enter semi x-ray mode making it easier to see vertices on the other side of the cube. Select the top four vertices and press E then Z to extrude along the z-axis, then press the S key and scale the face down slightly. Continue doing this two or three times to form the basic trunk of your tree. You can select the base of the tree with ALT+RIGHT-CLICK
And press the S key to scale it up slightly. Continue adjusting until you are happy with the basic shape.
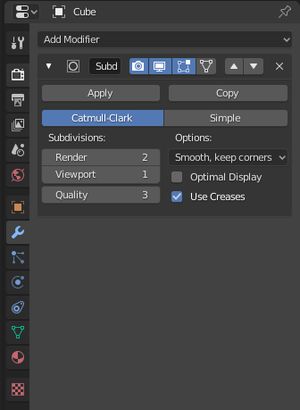
Next, with the tree trunk selected and in object mode create a subdivision surface modifier. The modifier menu is found under the spanner icon in the properties panel. Feel free to use as many levels of subdivision as you want, however, one level is all you really need for a low poly pine tree. Make sure you are in object mode then click apply in the modifier tab.
Press TAB to change back to object mode. RIGHT-CLICK and select shade smooth from the menu. At this point, we want to preserve this low poly version so press SHIFT+D to duplicate the model then press H to hide it. We will be coming back to this low poly version later.
Adding a bark texture
Find a seamless bark texture online or create one yourself from photographs using Krita or Gimp. The process of creating textures will be covered in another tutorial.

Head over to the shading tab to create a material for the trunk. In the material properties panel, click new then make sure use nodes is selected. Click the circle icon next to base colour and chose image texture. You can load your image from within the node in the node editor.
For simplicity, I will not be doing a complex UV layout. After switching to the UV editor tab select the tree trunk hit TAB to enter edit mode, press the U key to open the unwrap context menu and select cylinder projection. Scale the UV’s to your liking.
Creating branches and leaves
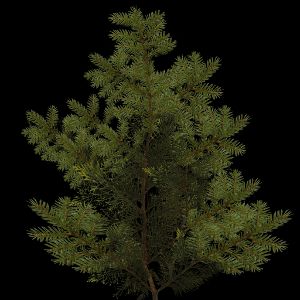
Find or create a branch texture similar to the one below, be sure to use an image that has a transparent background.
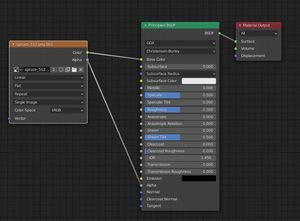
Press SHIFT+A and create a plane. Move it away from your trunk, then enter edit mode with the TAB key and scale it up by pressing S then X to constrain to the x-axis. You want a roughly rectangular shape for your branch. In the shading tab, create a new material for the branch. To make the gaps between leaves transparent, connect the alpha channel from the image node to the alpha channel on the PrincipalBSDF node. Then in the Material properties panel under settings, select alpha clip.
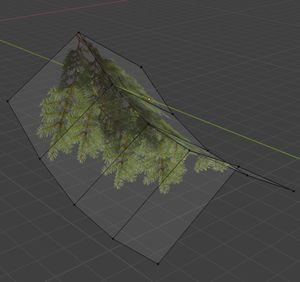
Next, create a loop cut to divide the branch down the centre. This can be achieved by pressing SHIFT+SPACE and selecting loop cut from the context menu, or by using the shortcut CTRL+R .With the loop cut in place, click the outer four corners of the mesh and move them down on the z-axis to create a tent-like shape.
I am once again going to save this as a very low poly version of the branch by pressing SHIFT+D then hiding it with the H key.
Back to the detail version of our branch create three more loop cuts on the opposite axis, dividing the length of the branch into quarters. Move these new vertices on the z-axis to create a curve in the branch.
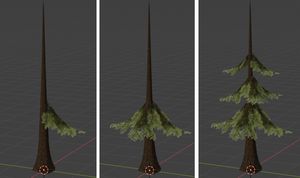
Now attach the branch to the trunk of your tree positioning it as desired. Duplicate the branch with SHIFT+D rotate it 180 degrees and attach it to the opposite side of the trunk. Select both these branches and duplicate them, then rotate 90 degrees. This will form the bottom layer of your branches. After this duplicate all four branches and move them up the trunk, resize them down a little then continue working all the way up the tree. Try and add a little variation to the rotation, spacing and size of the branches to add character to the tree.
Once done select all the branches and combine them into a single object, RIGHT-CLICK and select join. If an error occurs "active object is not a selected mesh" you need to select one of the branches as the active mesh with SHIFT+LEFT-CLICK, The active branch will display in a lighter shade of yellow as below.
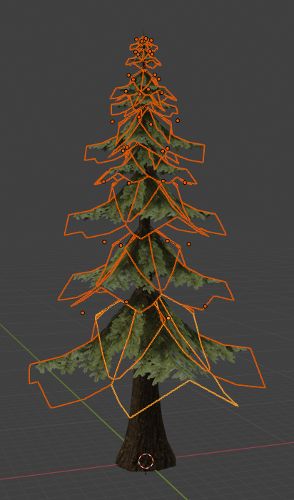
Once the mesh is combined, RIGHT-CLICK and select snap 3D cursor to world origin.Then RIGHT-CLICK again and select set origin to 3D cursor.This should ensure both the tree trunk object and branch object are correctly aligned to each other when importing into a game engine.
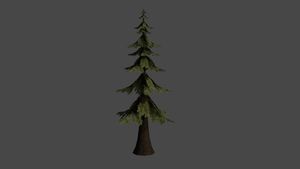
And here we are with our finished pine tree!
A lower poly version and LOD
So what was with that ugly blocky version of the trunk and branch that we duplicated and hid? Well in video games drawing lots of trees to the screen is computationally expensive for the graphics card. Our previous model clocks in at 744 triangles which while very low poly for modern graphics cards, is still unnecessary for distant trees. When a tree is in the distance we can switch it out for a lower poly version. After all, we don’t need to have as much detail as the player won’t see it anyway. This technique is known as LOD (Level Of Detail) and is used extensively in 3D games.
Let’s follow a similar process as above to create the low poly version using the two objects that we saved away earlier. For the branches add one additional loop cut to add a slight curve and more natural shape. For the trunk, the square shape is a little sharp so add a subdivision modifier as per the full poly version. This makes the trunk nice and cylindrical but creates too many edge loops up the trunk. To fix this select two vertices that are vertically adjacent to each other, RIGHT-CLICK and select merge > merge at centre.
This version of our tree should be around half the amount of triangles as the full polly version.
The lowest poly version an imposter
We can go even one step further for trees that are really far away. To do this simply create a render of your detailed tree model, save the image, and use it as a texture on a rectangular plane. This technique is known as an “imposter”. In your game, you can set this ‘flat’ version of the tree to always face the player and they should hardly be able to tell the difference.
Position your camera and pressF12to render your scene. You may wish to arrange some lights to ensure the imposter tree is evenly lit in a similar fashion to the fully rendered version. Ensure only your detailed tree is visible to the renderer by clicking the filter button at the top of the outliner panel. In the render properties panel under film check the transparent box. This will cause your rendered image to save the alpha channel which is needed to create your imposter tree.
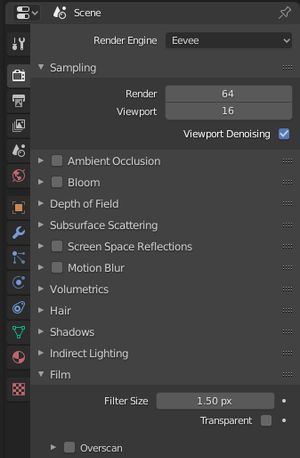
In your favourite image editing program open the saved render and resize it to 256x256 pixels. The reason I am making such a low res version is that this tree will only be shown in the far distance and will never take up more than 256 pixels on the screen. Back in Blender create a plane and scale it to match your tree model. Then create a new material and apply the rendered tree image as a texture. This version of our tree clocks in at a whopping 2 triangles!
Our final result
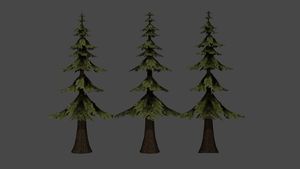
And here we have our final result of a simple pine tree with three stages of LOD. In future parts of this series, we will create some more variations of the pine tree as well as more complex shaped trees. We will also learn how to create textures for our trees in GIMP and import the model into the Godot game engine for use in our game projects.
More in this series
- An introduction to creating 3D stylised trees and forests in Blender
- How to model a low poly stylised pine tree in Blender

